Installing a 4WD Winch into a Toyota Landcruiser Factory Bullbar
Sherpa 4WD Winch Install
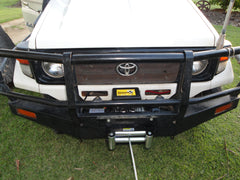
Sherpa 4WD winches are high quality, CE Certified winches made to ISO 9001 standards. The following installation is for a 12,000Lb Sherpa Steel Cable Winch and was performed on a Toyota Landcruiser utility, 2001 Model with factory fitted bullbar. Sherpa winches will fit the majority of winch bull bars such as ARB, TJM, Toyota etc, with little or no modification. Sherpa 4x4 can also supply a universal winch plate to assist in installing Sherpa 4x4 winches when bolt patterns do not match your bull bar.
Note: This document acts only as a guide for installing a Sherpa 4WD Winch. While the steps are generally the same for all makes and models there can be differences in some steps and the mounting position of the winch. In this case the winch is mounted on it's side with the main winch mounting bolts in the horizontal plane.
Ammendment: Sherpa 4x4 released a new range of 4WD winches in 2015. The installation process is still very similar but the steps may not apply directly to your vehicle.
Other common installations include the main winch mounting bolts in the vertical plane (shear force during winching).
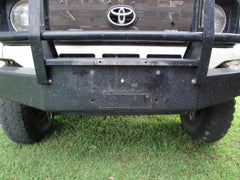
Step 1: Preparing the bull bar
– Remove the fairlead or hawse plate cover at the front of the bullbar. On this model bullbar it could be tapped out with a hammer..
– Remove the covering plate on the bullbar to clear the space where the winch will sit.
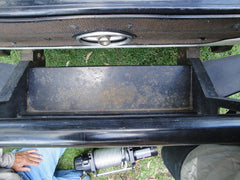
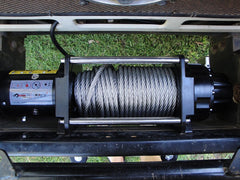
Step 2:
– Lower the winch into place. In this case the winch is mounted sideways with the bolt holes pointing towards the front of the bullbar. The winch should be mounted with the wire spooling in the underhand position.
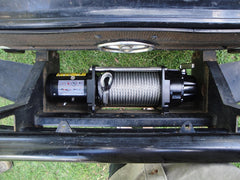
Step 3:
– Bolt the winch and roller fairlead to the bullbar. In this case the roller fairlead is mounted using the bottom two winch mounting bolts. To install the synthetic rope version the winch hawse would be bolted in the same fashion as the roller fairlead.
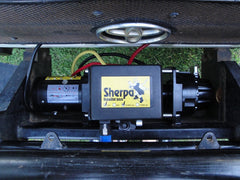
Step 4:
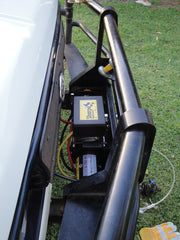
– Relocated the guide pin. This needs to be moved as the winch was mounted on its side and allows the control box to be mounted on top of the winch.

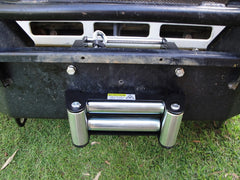
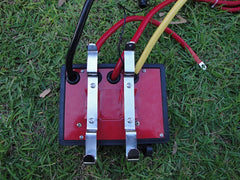
Step 5: Mounting the control box
– The control box can be mounted in any convenient location as long as the wiring reaches the winch and battery. It should be mounted to reduce the change of damage.
– Attach the brackets provided to the base of the control box.
– Loop the brackets over the guide pin and tighten the screws in place.
Step 6: Wiring
– Wire the control box to the battery and winch as per the wiring diagram provided with the winch. The wires are colour coded making this simple.
– Ensure all wiring is clear of moving parts. Zip tie any excess inside the engine bay.
– Make sure all terminal boots are properly covering the terminals.
Step 7:
- Feed the wire or rope through the fairlead/hawse and attach the hook provided. When not in operation ensure the hook is securely mounted and that no excess cable or rope is left hanging from the vehicle.
Step 8: Operation
- For operating instructions please see the manual provided with your Sherpa winch. All winches are supplied with a wired hand remote for release and retrieve control. Wireless winch remotes are an optional extra and available for all Sherpa 4WD winch models.
For more information on the Sherpa 4x4 range of 4WD winches and accessories please see Sherpa 4WD Winches.